You'll need:
one mouse trap
4 old CDs (or the clear CD-shaped covers you get on stacks of blank CDs)
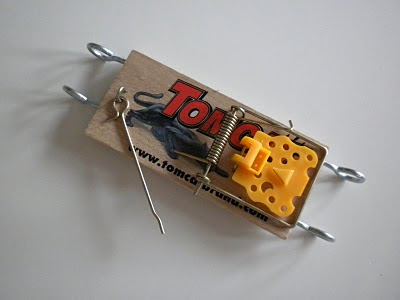
4 small eye bolts
2 pens
a yard or two of string
6 large balloons (bigger is better)
 Step 1: Cut your balloons. Trim off the top and the bottom of two of the balloons and use that rubber ring to stretch around the outer rim of two of the CDs. These will be your back tires and will be good for traction. Our mouse trap car went particularly fast with the help of Etta James, Nina Simone and Duke Ellington. Cool CDs promote speed.
Step 2: Make your axles. Pull off the cap, tip and bottom of your pens so that you have only the hollow tubes left over (as shown in the picture of the supplies). Take one of the tubes and, using one of the eyebolts, screw a hole into the middle of the tube on one side big enough to insert the string. One hole in one side of one axle. Got it? This is your rear axle.
Once you've got the hole thread the string through. This can be tricky but if you lick it and twist it you can do it. Once it's through, draw it through past the end of the tube, tie a BIG knot in the end and draw it back so that the knot catches and keeps the string from pulling out of the tube.

Step 3: Attach your axles. Take the four eyebolts and screw them into the four corners of your trap. This can be tricky because the wood can split--though not badly enough to really affect the performance. If you want to be careful you can use a drill with a tiny bit and predrill the holes (that's what I did) and it seems to take most of the worry out.
Push your axles through the eyebolts to attach them. It should be tight enough to keep them in place without rattling around but loose enough to turn freely. You can use pliers to squeeze the eyebolts slightly smaller or stretch them slightly bigger if you need to. Your rear axle goes in the back and the front axle goes in the front (this is the side that has the spring mechanism on it when the trap is sprung and at rest).

Step 4: Attach your wheels. This is the trickiest part and while I'll tell you how you're supposed to do it, if you have troubles I'd suggest using a hot glue gun and securing the wheels in place that way.
Take one of your balloons and fold it in thirds lengthwise and then wrap the balloon around the end of the axle. Once you've got nearly to the end slip the CD on over the end until it's sitting rather tightly on the end and doesn't shift around too much. Then wrap finish wrapping the end of the balloon around the end of the axle, slipping the rubber ring on the end over the end of the tube to secure.
If it doesn't hold, hot glue will keep it stiff in place.

Step 5: Attach your string to the trap. With your front and rear axles and wheels in place you're ready to thread the string. Take the string that is coming from the middle of your rear axle and tie the other end to the bar on the spring mechanism of the trap. If it's nylon you may need to fuse the end with a match to keep it from unraveling through use.
Tie it firmly and you're now ready to roll.
Step 6: Wind it up and let it go. Push the car backwards and the rear axle will wind up the string. Pull the spring back carefully with your thumb (don't snap yourself!) and wind the axle enough to keep the string taut.
Set it on the floor and release. Then clap because it's kind of cool.

Note: You could also do this same thing with Tinkertoys. Spencer put another car together and it worked great--though you may need to tape the end of the string to the axle rather than drilling a hole through the middle of it.
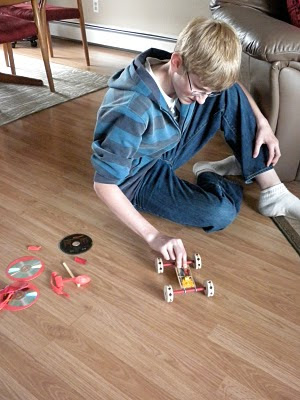
Here's a shot of the cars in action:
Sponsored by Beau-Coup for unique baby shower favors.

6 comments:
Excellent idea. This will be used during a rainy day.
Ok that is just brilliant. We will be doing this one this summer. What fun!
Wholly cow that looks like fun!! I am not a crafty person. My crafts always turn out horribly! My son though is very in to stuff like this! I think even I can't mess this one up! Thanks for the idea!!
PS/I didn't comment on it but I LOVED the eco-system and he's planning to build one for next year's Science project! Very cool!
Tinker Toys are our bread and butter over here.
Thank you for posting this!! My nieces and I made a couple this morning and have spent half the day outside having races, and even the neighborhood kids joined in on the fun! Thank you again!!!!
I always wanted to do this when I was younger and never got to. Thanks so much, I'll be linking.
Post a Comment